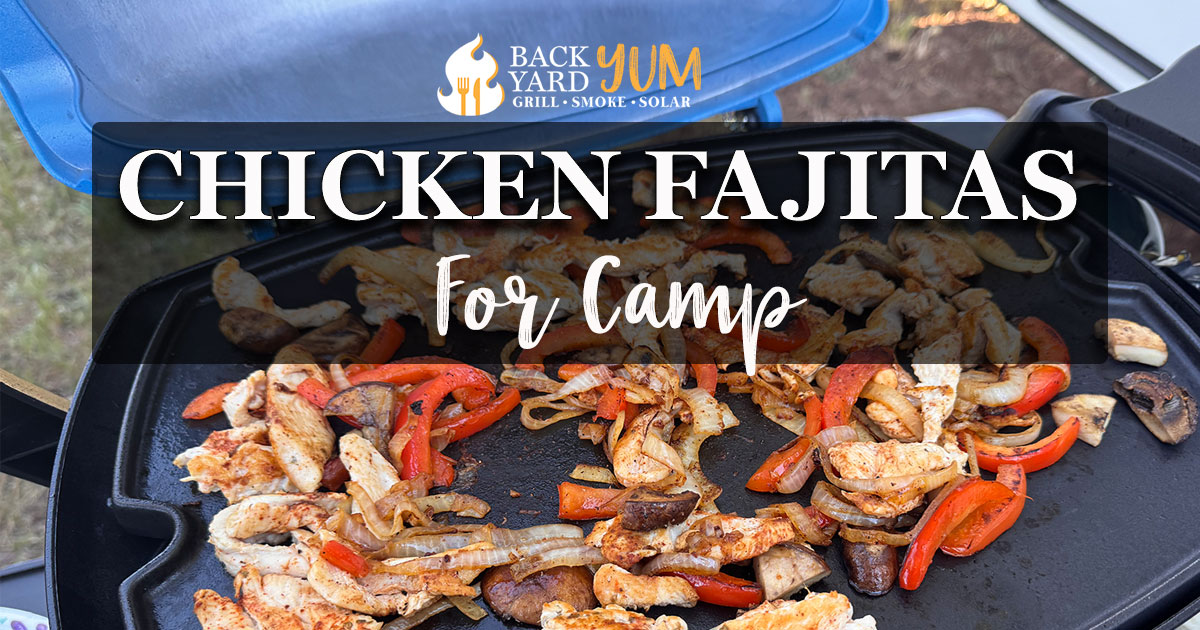
Fajitas are one of my favorite camp meals because they feel like real, whole, nutritious food without turning dinner into a big production. You get seasoned chicken, peppers, onions, warm tortillas, and all the toppings, but the cooking process is still simple enough for a campsite, RV, or quick outdoor dinner.
The real trick is doing most of the messy prep at home. I like to slice the chicken, season it, and pack it in a sealed container before the trip. I do the same with the peppers and onions, keeping them separate from the raw chicken.
That way, when it is time to cook, all I have to do is heat the skillet or griddle, add a little oil, and start cooking.
This is especially helpful when camping without hookups. If you are hauling your own water (like we do often in the southwestern USA) or working with a tiny RV kitchen, you probably do not want to deal with raw chicken, cutting boards, knives, and repeated hand washing at camp. A little prep at home makes this recipe faster, cleaner, and much easier to manage outdoors.
Equipment Needed for Camp Fajitas
You don't really need any special gear to make fajitas at camp. The main thing you need is a hot, flat cooking surface where the chicken and vegetables can spread out and brown instead of steaming.
What you will need though, is a cook surface that works with high heat. Don't try to use a non-stick skillet. Go for cast iron or carbon.
I use my Weber Q1200 gas grill with a griddle top. You're using your grill, but the griddle keeps the sliced chicken and vegetables from falling through the grates. I like this setup because it serves multiple purposes, rather than packing both a grill and a separate Blackstone.
A cast iron skillet works great on a camp stove or RV cooktop. It holds heat well, gives the chicken and vegetables some nice browning, and can also be used to warm or lightly fry the tortillas after the filling is cooked.
A Blackstone griddle or other outdoor flat-top griddle is a good option if you have one. There is plenty of space for the chicken, peppers, onions, and tortillas, and you can move ingredients around as they finish cooking. I don't use this for camping because it's just another piece of equipment to pack.
You can also use a regular grill basket or grill pan, but I prefer a flat cooking surface for fajitas. The chicken strips and vegetables are easier to turn, and the seasoning, oil, and juices stay with the food instead of dripping away.
Helpful extras include long tongs, a spatula, an instant-read thermometer, a plate or bowl for the cooked filling, foil for keeping tortillas warm, and a cooler or RV refrigerator for holding the prepped chicken and vegetables until dinner.
My RV (and sometimes 4Runner) Grill Setup
Weber Q1200 Grill
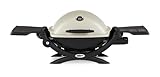
- The Titanium Weber Q1200 Travel Grill features porcelain-enameled, cast-iron cooking grates; Grates offer superior heat retention, flavor infusion, and an attractive appearance as you elevate your grilling experience
My Weber Q Grill Accessories


Prep Your Fajitas Ahead
When I plan to make fajitas on a camp trip, I always prep the chicken and veggies ahead. Here's why:
Water Conservation: When I camp I am usually hauling in my own water (no campground hookups) so I have to conserve water. I live in the mountains of Arizona and rarely am I camping near a water source.
If I'm cutting and handling raw chicken I'll usually have to wash my hands several times during the prep process, which uses too much water.
Adapt to Small Workspace: Depending on what you're camping in, or what your kitchen setup is like, you may be limited in counter space. By pre-prepping, you don't need space for a cutting board or multiple knives and bowls. Just dump the ingredients on the prepped grill!
It's Just Easier: Less food prep time, and dinner ready sooner.
All you have to do is slice up your chicken, season it, and put it in an airtight container. Slice up your peppers and onions and combine them. Season and put those in an airtight container (separate from the chicken). If you are using any mushrooms, add those in with the peppers and onion. Chopped cilantro, or other meats or veggies for your fajitas, prep those too and store separately from the other ingredients.
Camping Fajita Ingredients
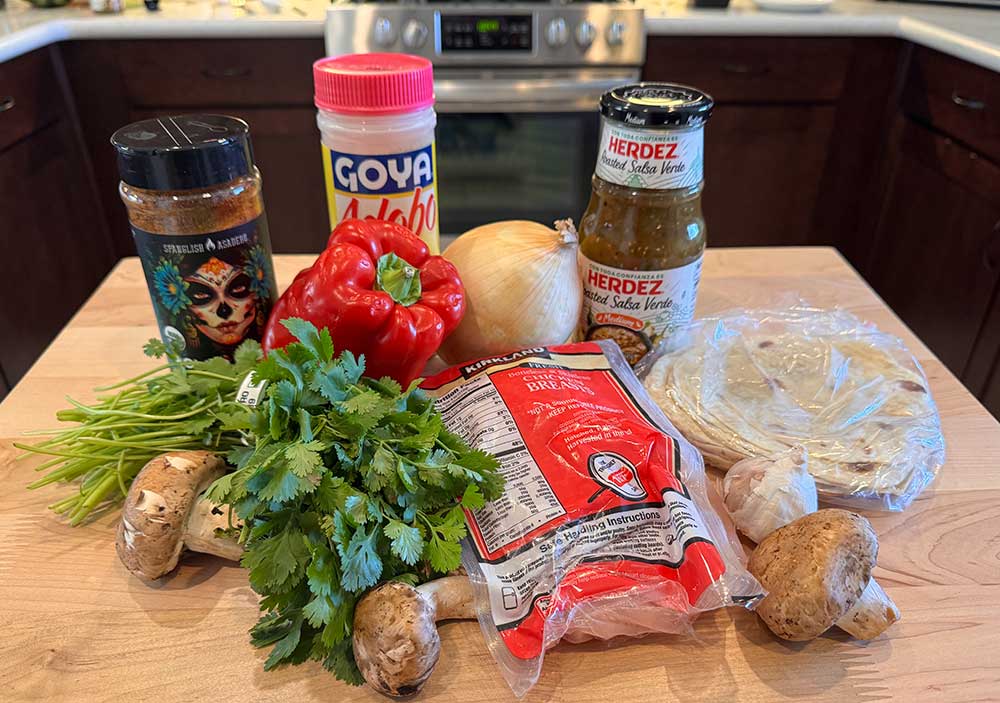
Chicken breast - Sliced into thin strips. You can use chicken thigh meat if you prefer. I like the breast meat because it's leaner, but a lot of people find the thigh meat (dark meat) is more flavorful. Your choice!
Bell pepper - Any color works, but red or orange look best on the plate.
Yellow onion - Sliced into thin strips.
Mushrooms - A non-traditional fajita ingredient, but add a very nice extra layer of flavor! I often get happy comments when I add the mushrooms. If you have kids, or someone who's mushroom-averse you might skip this ingredient.
Minced Garlic - ½ tablespoon (if using jarred) or 3 minced cloves.
Cooking Oil - I have listed 5-8 tablespoons of a high-heat cooking oil. Use canola or avocado oil for best results, but vegetable oil or even olive oil work in a pinch. You'll use the oil in several steps. Not pictured above - who wants a picture of canola oil!
Fajita Seasoning - I don't use any liquid ingredients in my fajitas other than salsa or sour cream when it's served. I prefer to just use dry seasoning. I use adobo seasoning on the vegetables, and a fajita seasoning on the meat.
For the fajita seasoning, you can use a store-bought fajita seasoning, Tex-Mex seasoning, or similar. Alternatively, mix a little chili powder with any Tex-Mex or southwestern seasoning combo.
Cilantro, Sour cream, and salsa - To top your finished fajitas!
Tortillas - Your choice of corn or flour.
What to Serve with Camp Fajitas
Now that you have your chicken, peppers & onions, and tortillas all ready to eat, you'll probably want some sides to go with that. Here are some popular sides...
- Chips and salsa - Naturally!
- Beans - refried, black, or pinto beans
- Spanish rice
- Corn salad
- Avocado slices
- Even just a simple bagged salad would work
Camp Cooking Tips
Keep the raw chicken container separate from the vegetables and toppings. Once the chicken goes on the griddle or skillet, do not reuse that container for cooked food unless it has been washed.
Slice the chicken thin so it cooks quickly and evenly. Thin strips are also easier to eat in a tortilla.
Do not crowd the cook surface too much. If the pan or griddle is overloaded, the chicken and vegetables will steam instead of getting that good fajita-style browning. If you are using a smaller skillet, cook in batches.
Use an instant-read thermometer to check the chicken. The chicken should reach 165°F before serving.
Pack toppings separately so everyone can build their own fajitas. Salsa, sour cream, cilantro, shredded cheese, avocado, and lime wedges are all easy additions.
How to Make Easy Camp Fajitas
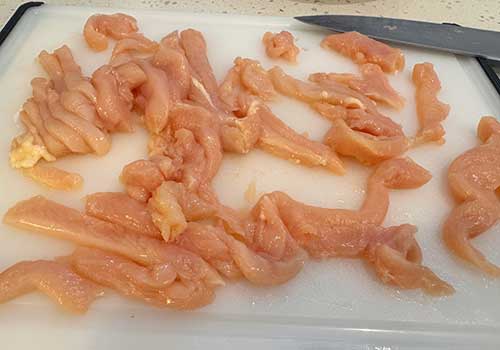
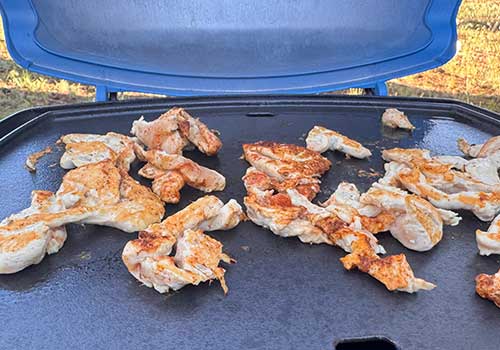
- Step 1: At home, before you leave, slice your chicken breast into thin strips. Generously sprinkle fajita seasoning on the strips. Put in an airtight container and store in the refrigerator until ready to cook.
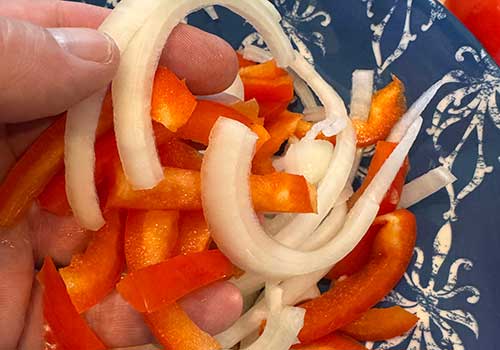
- Step 2: Slice your bell pepper, onion, and mushroom (if using) into thin strips / slices. Sprinkle with Adobo seasoning. Put in an airtight container and store in the refrigerator until ready to cook.
- Step 3: At camp, preheat your cook surface. Add 1 tablespoon of oil.
Cook chicken for 4-5 minutes until there is only a hint of pink showing (not quite done). Remove from cooktop and set aside.
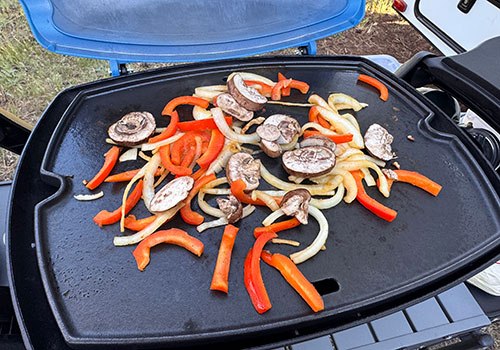
- Step 4: Put 2 tablespoons oil on grill surface, and add the vegetables. Sprinkle with adobo or fajita seasoning during cook. Cook 5-7 minutes until peppers are soft.
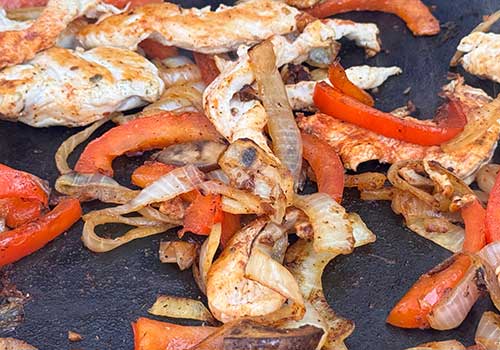
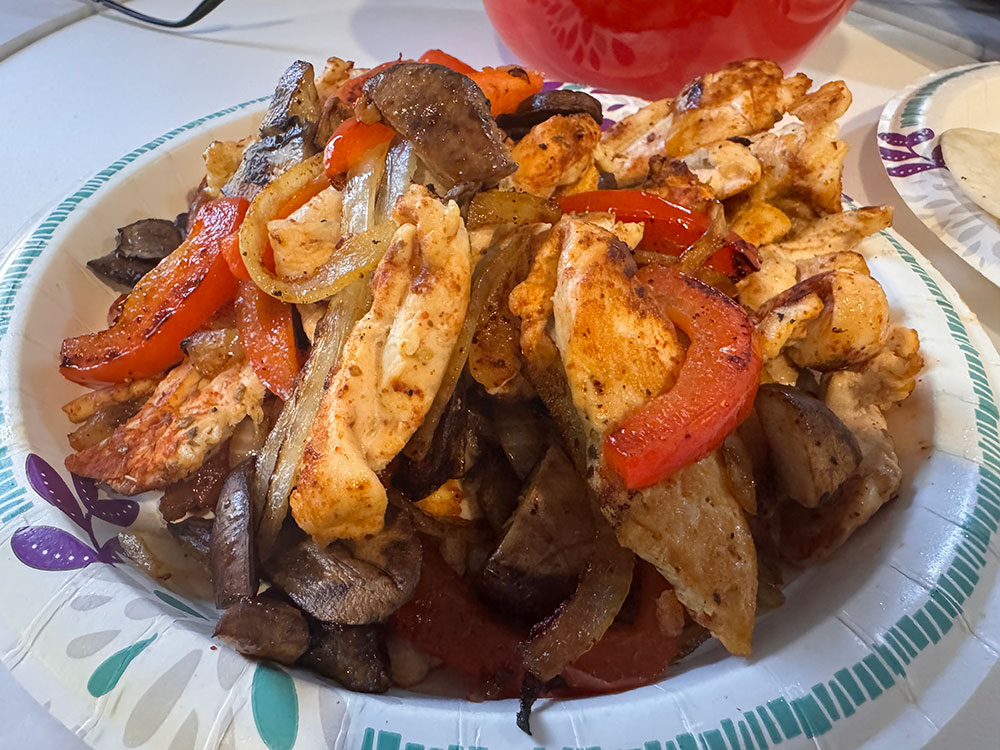
- Step 5: Add the chicken to the veggies. Cook it all another 3-5 minutes or until chicken is fully done (165 degrees). Add garlic and cook 2 more minutes or until garlic becomes fragrant.
Remove chicken and veggies from grill and set aside.
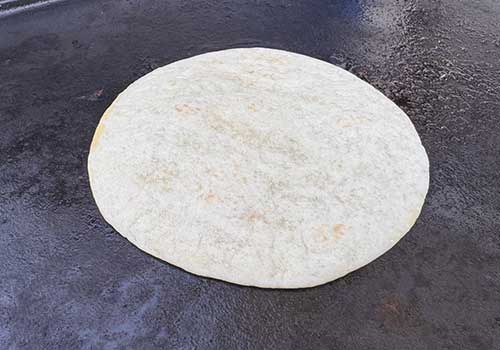
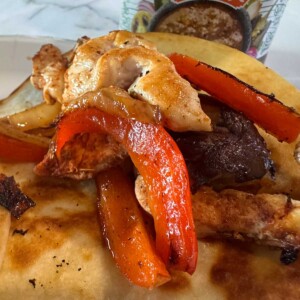
- Step 6: Prepare to cook your tortillas. Either corn or flour tortillas are fine. Your choice.
Add 2 tablespoons oil to hot grill surface. Add tortillas. Add more oil to cook surface if needed - but not too much because you don't want to saturate the tortillas.
- Step 7: Cook in oil, flipping every 1-2 minutes until they are golden brown.
You are looking for tortillas that are a little bit stiff (for crunch), but still pliable (to fold in half).
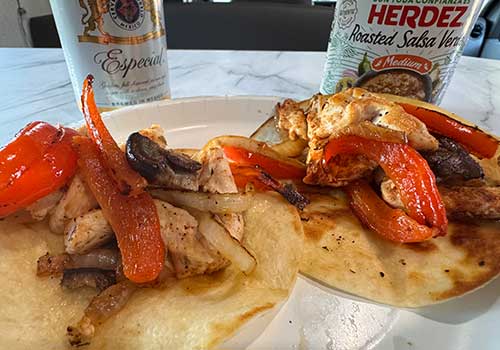
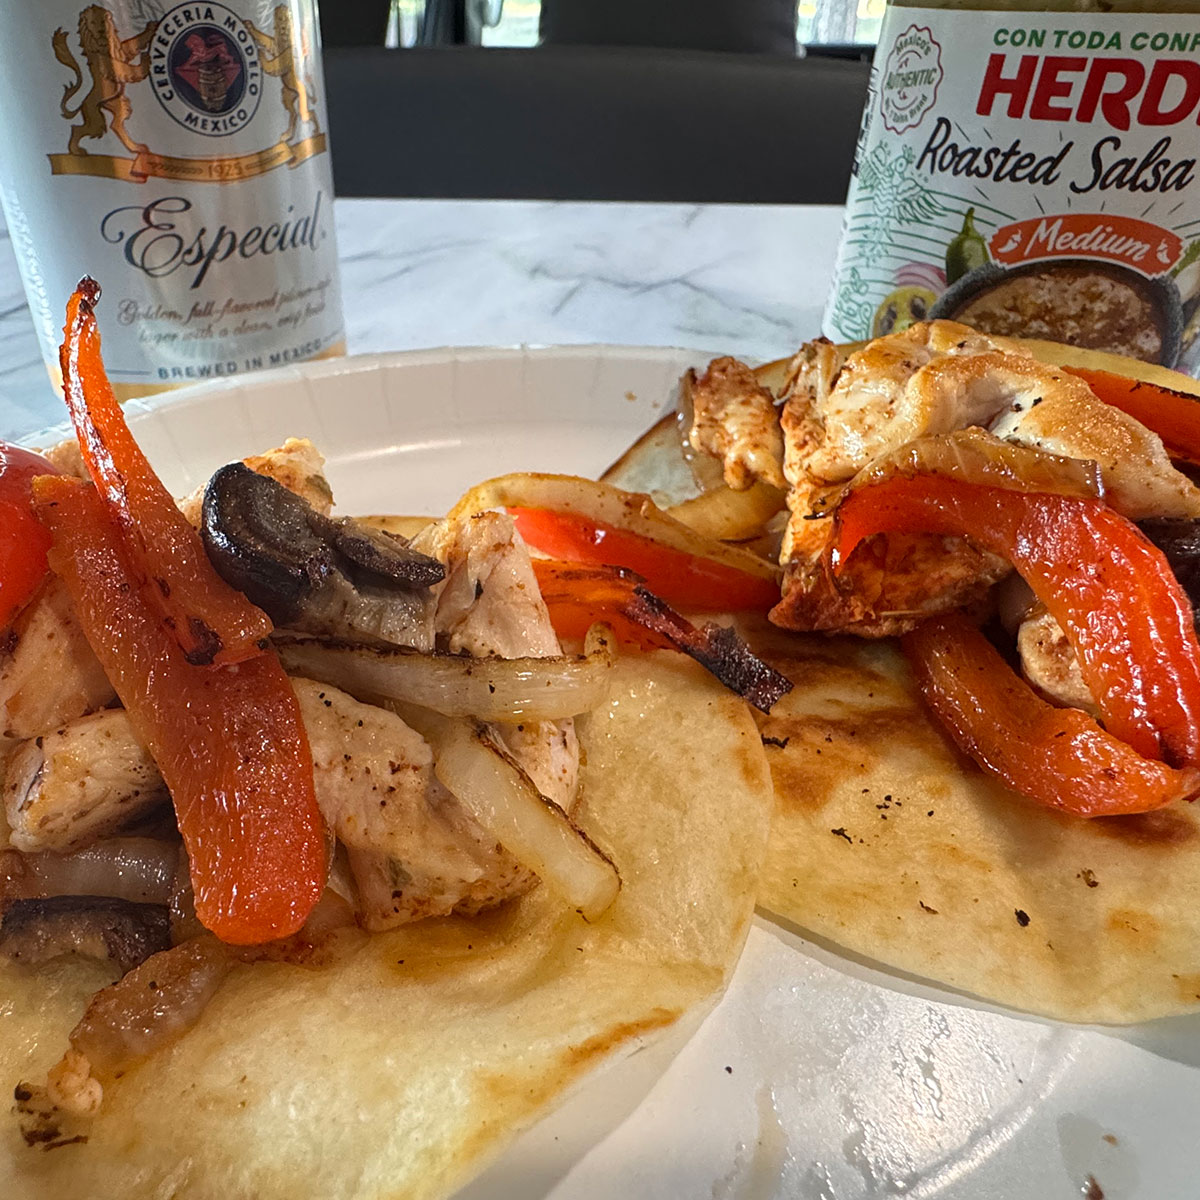
- Step 8: Serve and enjoy!
I like to serve the filling in a bowl with small tongs, and tortillas on a separate plate.
Optional garnishes of cilantro, salsa, sour cream are amazing! This lets everyone build their own.
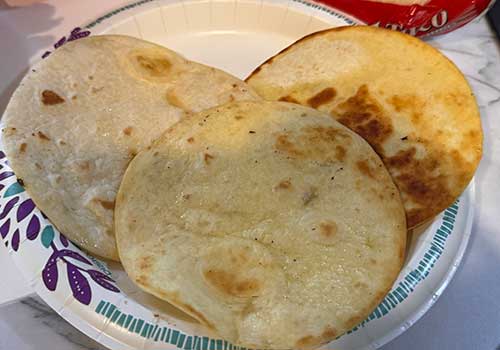
How to Fry Your Tortillas on a Cooktop
You can serve fajitas with plain warmed tortillas, but lightly frying them makes the meal much better. The goal is not to deep fry the tortillas into chips. You want them lightly browned, a little crisp around the edges, and still soft enough to fold.
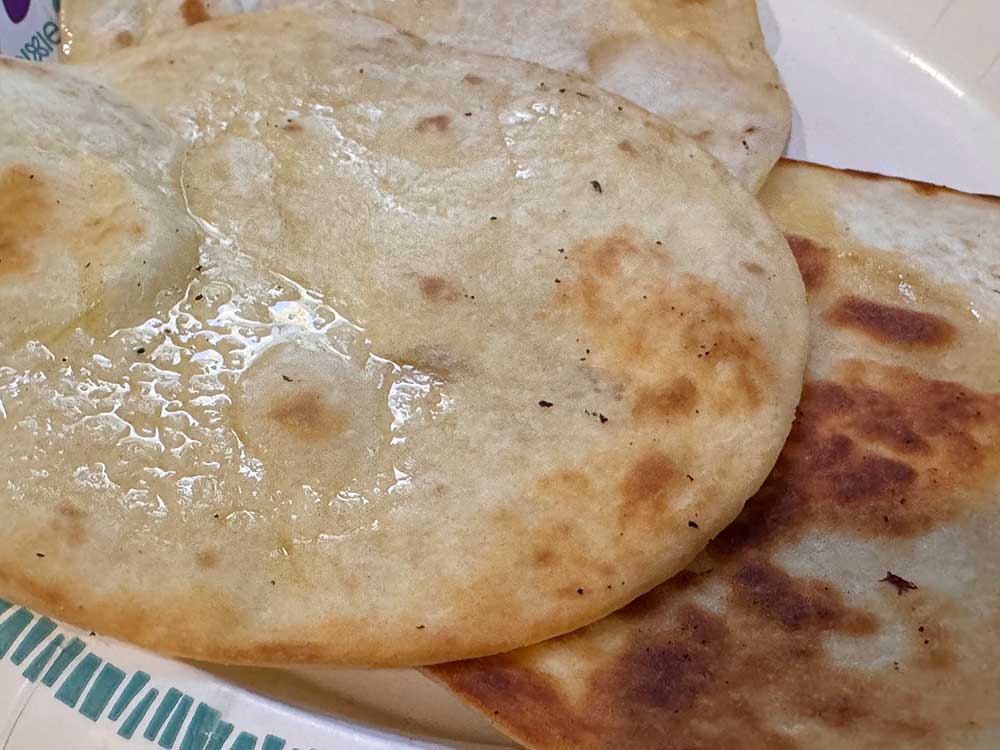
After the fajita filling is cooked, wipe out the skillet or clear a clean spot on the griddle. Add a thin layer of oil and let it heat for a minute. You only need enough oil to lightly coat the surface. If the tortilla is sitting in a puddle of oil, that is too much.
Place one tortilla on the hot surface and let it cook until it starts to bubble and pick up a few golden brown spots. Flip it with tongs and cook the other side. Flour tortillas usually cook quickly, so watch them closely. Corn tortillas can handle a little more oil and may need a bit more time to soften and brown.
For fajitas, I like tortillas that are slightly crisp but still bendable. If they get too stiff, they will crack when you fold them. If they are still floppy and pale, give them a little more time on the hot surface.
As each tortilla finishes, move it to a plate and cover it loosely with foil or a clean towel. This keeps the tortillas warm while the rest finish cooking. If you are cooking for a group, fry the tortillas last so everyone can build their fajitas while the tortillas are still warm.
Chicken Fajitas Recipe (Easy and Clean for Camp)
Ingredients
- 1.5 lb chicken breast sliced thinly
- 1 bell pepper sliced thinly
- 1 yellow onion sliced thinly
- 4 oz mushrooms thickly sliced - about ¼"
- 8 flour tortillas taco-size
- 1 tablespoon dry fajita seasoning
- ½ tablespoon adobo seasoning
- ½ tablespoon minced garlic 3 cloves
- 5-8 tablespoon cooking oil, divided, as needed (canola, avocado, or vegetable)
- cilantro chopped for toppings
- sour cream toppings
- salsa toppings
Instructions
Pre-Trip Prep
- Thinly slice the chicken. Season strips with fajita seasoning (no need to measure seasoning, just liberally shake over the chicken). Put in an airtight container and store in fridge.
- Thinly slice pepper and onion. Slice mushroom into roughly ¼" slices. Season veggies with adobo seasoning. Put in airtight container, separate from chicken, and store in fridge.
Cook Instructions
- Preheat cooking surface and add 1 tablespoon oil. Place chicken strips on hot surface and cook 4-5 minutes until only a hint of pink is showing. Remove from cooktop and set aside.
- Add 2 tablespoon of oil. Add all vegetables to cooktop. Sprinkle with adobo or fajita seasoning during cook. Cook 5-7 minutes until peppers are soft.
- Add the chicken to the veggies. Cook it all another 3-5 minutes or until chicken is fully done (165 degrees). Add garlic and cook 2 more minutes or until garlic becomes fragrant. Remove chicken and veggies from grill and set aside.
- Add 2 tablespoons oil to hot grill surface. Add tortillas. Add more oil to cook surface if needed - but not too much because you don't want to saturate the tortillas. Cook in oil, flipping every 1-2 minutes until they are golden brown.
- Serve with cilantro, sour cream, and salsa.
Leave a Reply