The bulk of this tutorial explains the most popular uses for the Sun Oven, as well as, how to cook in various weather conditions, and finally dives deep into several cooking topics.
It closes out with a few uses you may not have thought of that are just as valuable as cooking bread and dehydrating herbs.
1) Keep in mind that food cooks at a temperature of 180° and above in the Sun Oven, if the temperature drops below 180°, you’re no longer cooking.
2) Keeping your reflectors clean by simply using glass cleaner will always enhance the performance and heating of the Sun Oven.
3) When you store your Sun Oven, don’t lock the glass door down with the latches, by leaving it open it won’t retain the smell of the food you cooked before putting it away.
4) Any roast or large bird (for example a turkey) over 4 pounds must be 100% thawed before putting them into a pre-heated Sun Oven, or they won’t cook properly.
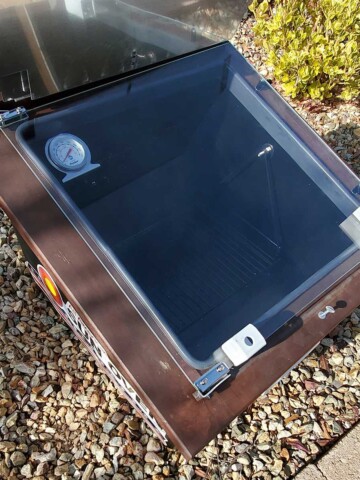
5) The Sun Oven should always be preheated before cooking. It is recommended that you place the Sun Oven with the glass door closed and latched down in the sun and let it preheat. In strong sun the Sun Oven will usually reach 300 degrees F in about twenty minutes.
6) The Sun Oven method of cooking is so natural and subtle that much less moisture is required for recipes – cooked in covered pans, that is. The natural, internal juices come into unique play, resulting in a superior, moist taste. Be sure to cut down, by at least one-third, any liquid measurements called for in rice, stews or sauces. This does NOT apply to bakery products.
7) Since foods do not burn in the Sun Oven, it is not necessary to stir foods after they are placed in the oven. Use a meat thermometer to determine when to remove meats (put the meat thermometer in the meat before placing it in the oven). Opening the oven door unnecessarily will slow the cooking process, since some heat will escape.
8) When you are done cooking it is best to remove any moisture from the interior of your Sun Oven by wiping it out with a dry cloth. Maintenance on your Sun Oven is very minimal. Using any non-abrasive glass cleaning solution, such as Windex, will keep the reflector material and glass clean. If the reflectors and glass are not kept clean, the oven will not reach its target temperature.
Remove the protective film from the reflectors.
Set the Sun Oven facing the sun. Close the glass door and turn both latches over the glass. Leave the Sun Oven in this position for 25 to 30 minutes.
Using an oven mitt release the latches and open the glass door. Pour 1 ½ cups of water mixed with a few drops of dish soap, into a pot and place the pot, without a lid, inside the hot Sun Oven and close and latch the glass door.
Realign the Sun Oven.
Leave the Sun Oven in the sun for 90 to 120 minutes with the open pot of soapy water. Every 30 minutes realign the oven.
After the oven has been heated and well steamed, completely clean the inside of the chamber and the inside of the glass door with the hot soapy water mixture. While cleaning, it is best to scrub hard on the interior of the glass around the area where the glass meets the black gasket.
Now you’re ready to start cooking.
Preheating a SUN OVEN
Just like a conventional oven, some recipes require preheating. In short, preheat for everything unless you are using an all-day recipe. To preheat the Sun Oven, set it up and align it to the sun before you prepare a recipe. That way the oven is preheating while you’re getting the food ready. When your food is all prepared, the Sun Oven is preheated and ready to cook. On a clear day, the Sun Oven heats to 300° in about 20 minutes.
Even though it’s called an oven, you can do a lot more than just bake. The Sun Oven cooks anything normally cooked on a stovetop or in a gas or electric oven. The only exception is fried food. The Sun Oven is not compatible with frying food. So, anything that is baked, boiled, roasted, or steamed can be cooked in the Sun Oven.
Sun-Roasted Turkey
Turkey is amazing when cooked by the sun. It’s so moist and juicy that it’s hard to describe. Everyone who eats sun turkey says the light meat is even moister than the dark meat. This is all thanks to the slow cooking process. The Sun Oven can make up to a 21-pound turkey.
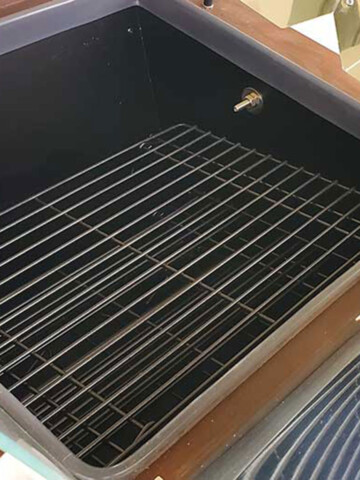
The key is to use a baking bag. Fold up the leveling rack and store it on the bottom of the Sun Oven floor. Put the turkey in a baking bag and set it on the rack. It works perfectly.
Never set a pot or a pan or baking bag directly on the floor of the Sun Oven, always fold up the leveling rack and set it on the floor of the oven. The way the Sun Oven heats is by producing an even flow of air that moves around the food. In technical jargon, this is convection. Hot air rises, cold air falls. If there isn’t airflow around the food, it won’t heat evenly and will have hot spots.
Remember, when using a baking bag, don’t cut slits in the bag. Even if the bag instructions tell you to do it, just tie the baking bag tightly, trapping the moisture inside, and then put it in the Sun Oven on the rack. Rubbing butter, olive oil, or sprinkling paprika on the skin of the turkey will turn the turkey dark brown. You will be totally blown away by how delicious it is.
Pizza
Yes, the Sun Oven can cook a pizza. Make mini-pizzas or up to a 12-inch pizza. 12” pizza stones give the best results. Put the stone in the Sun Oven and preheat as normal. Once it reaches 300° put the pizza on the stone and you’ll get a nice crispy crust. It does come out really, really delicious.
Vegetarian Cooking
The Sun Oven is wonderful for vegetarian cooking. The even temperatures of a Sun Oven are ideal for vegetable-based dishes.
Sun-baked bread is delicious! This section will cover a few of the secrets to baking the best loaf of bread possible. When baking bread in the Sun Oven, ALWAYS!, ALWAYS!, ALWAYS! preheat the Sun Oven. This is absolutely critical!
Next, when proofing\raising your dough, don’t let it raise the same height as when using a gas or electric oven. For the Sun Oven, it’s best to proof it ½” – ¾” below the top of the bread pan. The reason behind this is the even heating of the Sun Oven. When preheated to 325°, if the glass door is opened to put two loaves of bread in the temperature inside the Sun Oven will drop by 50° to 75° and then gradually increase. The bread is at room temperature and will continue to rise until the oven comes up to temperature. If the bread was proofed to full height already, it would overproof above the top of the pan. As the Sun Oven comes back up to temperature, there’s a good chance the bread will fall.
Therefore, start with the bread ½” – ¾” below the top of the bread ban, it will rise to just the right height. Next secret. To guarantee that the bread browns in the Sun Oven, spray a light mist of water on the dough just before putting it in the Sun Oven. The mist helps build that nice golden-brown crust.
The Sun Oven bakes white bread, wheat bread, gluten-free bread, sourdough bread, rye bread, and pretty much any kind of bread desired. When making bread in the Sun Oven, bake 1 loaf in about 45 to 50 minutes and 2 loaves in an hour to an hour and 10 minutes.
Beans
When cooked in the Sun Oven, beans develop flavor you just can’t get anywhere else. There are too many varieties of beans for a single recipe. Therefore, here are a few hints. If soaked overnight before cooking, beans cook a lot faster compared to unsoaked. Slowly simmer them all day with the align to noon method (See Aligning your Sun Oven section above).
They can also be cooked quicker by realigning the Sun Oven every 30 minutes. The Sun Oven can even get them bubbling and boiling for a really delicious taste. The starter recipe is 2 ½ cups of water for each 1 cup of dry beans. Add a few flavorings while they cook. Brown sugar, mustard, and bacon. The larger the bean, the more water and time you will need. The smaller the bean, the less time and less water. Feel free to experiment.
Hard-Boiled Eggs
The best way to illustrate the even heat of the Sun Oven is to cook an egg. If you preheat the Sun Oven and put just one egg in for about 35 minutes, you’ll have a perfect hard-boiled egg. All done with no water at all & amazingly easy to peel!
Think about the principle of boiling an egg, it’s very simple. Bring water to a boil, put the egg in the water, and the water heats the egg evenly around the eggshell. Well, that’s the way everything is cooked in the Sun Oven. The only difference is the Sun Oven uses hot air evenly around the eggshell (or anything that you’re cooking). When you cook two dozen eggs, preheat the sun oven before you put them in and leave them in for about an hour. You can overcook eggs if you leave them in way too long, 30 mins is ok.
One final note, if you have your eggs in the refrigerator, you will want to take them out of the fridge about an hour before you cook them so you will get the best texture.
Sun tea is a delicious thirst quencher! Make sun tea in the Sun Oven faster by putting it in Mason jars. Make up to six jars at a time. The perfect ratio is four cups of water to five tea bags. It’s also easy to make a variety of herbal teas. Put one cup of assorted herbs like mint or chamomile in 4 cups of water. It’s amazing how excellent tea tastes when you make it in the sun.
Dehydrating is one of the oldest forms of food storage and preservation. It’s also one of the best things about the Sun Oven. Use the Sun Oven for dehydrating fruits, vegetables, and even making incredible jerky. Dehydrating takes less time and cost less money than virtually any other form of food storage. The best part, it’s perfect for emergency preparedness when there is no power.
Benefits of Solar Dehydrating
The Sun Oven is an excellent solar dehydrator. You can dehydrate just about anything with the right precautions. When dehydrating, keep the temperature of the Sun Oven between 110° and 155°. Always keep it below 180°; at 180° you are cooking.
Equipment Needed
To use your Sun Oven as a dehydrator, you will need a rack, or a set of racks. If you don’t already have dehydrating racks, please see this article on racks that work great in the Sun Oven.
Dehydrating with the Sun Oven
To dehydrate, place a piece of parchment paper on the rack. Cut the pieces to fit the racks and place one on the leveling rack (on the bottom of the oven). Wash and dry the fruit or veggies and slice them thin. The thinner the better. Put the sliced food on the parchment with about ½” between the slices. Remember the thinner the cut of meat the faster it dries. In the summer, if you have too many tomatoes, slice them thin, place them 3 layers high, and in no time, the Sun Oven has produced perfect sun-dried tomatoes. Store them in a Mason jar and they’ll last about six months.
The two latches on the glass door shut to give it an airtight seal. To dehydrate use these latches to allow excess humidity to escape. Once the fruit, veggie, jerky, or herbs are placed on the dehydrating racks, instead of locking the glass door shut, turn one latch in, towards the center of the Sun Oven, and set the glass on top of the latch. The resulting gap allows moisture to escape. This also keeps it from getting too hot inside the oven. It creates the perfect solar dehydrator.
Once the food is in the Sun Oven, just line it up with the sun using the white E-Z sun indicators. Then move the oven back towards the East about six inches to keep it at a lower temperature. From there all you have to do is realign the oven 3-4 times during the day. Quick Note: If you get to the end of the day and the dehydrating isn’t done, no problem. Simply lock the glass door with the latches to form an airtight seal. This suspends the drying process overnight. As far as bugs are concerned, the Sun Oven chamber has an airtight seal, so don’t worry. No bugs will spoil your food overnight. Align the Sun Oven the next morning with the glass propped open to finish. Jerky takes around 12 hours to complete. This depends on how thick the meat is sliced.
Drying Herbs
The Sun Oven also dehydrates herbs. The real advantage of drying herbs in the sun is that the herbs retain more of their essential oils and vitamins. This is because the gentle heat doesn’t break them down like other methods of drying. Dried herbs are safe from rot, spoiling, and bacteria. Once dried, they remain potent for 6-12 months. When using home-grown herbs, water them well the night before you plan on picking and drying. It’s always best to pick in the morning in the days before they flower. Pick them and strip off the lower, tougher leaves. Rinse them well and shake off the excess water. Next, dry them off on a towel. Strip off the leaves and place them on the drying rack. Keep ½” of space between the leaves. Herbs need to be dried at a lower temperature. When dehydrating herbs in the Sun Oven, don’t exceed 100°. Just keep in mind that between 95° and 100° is the sweet spot for herbs. Check on the Sun Oven every hour and realign as necessary to keep the temp low.
Sterilize Instruments
Several international aid groups that take short-term medical mission trips take a Sun Oven with them. They use it to heat water to pour over the instruments and towels.
Generally, medical equipment is sterilized using something called an autoclave. An autoclave basically brings the psi to 20 and the temperature up to a above 250 degrees Fahrenheit for 30 consecutive minutes. After 30 mins above 250 degrees at 20 psi, you have sterile utensils.
The challenge with an autoclave is that they are expensive, require electricity, and are not very portable. In short, they’re difficult to use in the field. However, you can use your Sun Oven!
You can use either a wet method or dry method in the Sun Oven. Click here for details and to read our post on sterilizing medical equipment in the field.
Insect Infestation
While unpleasant, dealing with insects is important. Especially for those with a lot of food stored, dehydrated, or freeze-dried. If you have an insect infestation in your stored food, put them into the Sun Oven. Bring it up to a temperature of 140° for 10 minutes. That not only kills the bugs, but it also kills them in all stages of development. Now, if it’s something boiled during cooking, boil it and the bugs will float to the top. When they do, skim them off. For dried goods, sift through them and pick the insects out. It’s not the most pleasant thing, but at least the food will be saved and won’t have to be thrown away. Just bring it up to 140° for 10 min.
Restore Potting Soil
The Sun Oven restores potting soil. This process eliminates seeds, insects, and bacteria that can harm new seeds and plants. First, remove all plant material and roots from the soil. Next, take an old baking pan and put in a 2” to 4” layer of dirt. Spread it out evenly. Cover it with aluminum foil, shiny side of the foil facing down on the soil. Take an old dark dish towel and cover the foil. You don’t want to reflect the sunlight out of the Sun Oven and decrease the heat. Poke a hole through the dish towel and foil into the soil and stick a meat thermometer into the soil through the hole. Once the temperature reaches 180°, wait 30 minutes. You now have totally rejuvenated potting soil just with the power of the sun.
Winter Sprouting
Enhance winter sprouting with the Sun Oven. Sprouting thrives at temperatures between 75° and 80°. Use the Sun Oven® in the winter to give seeds a head start. Put the seeds in the Sun Oven with a long burning candle, the sprouts will flourish. It won’t hurt the seeds to take them out of the Sun Oven and use it to cook. Just put them back when you’re done cooking. When sprouting and using candles, dollar stores are the best bet! It’s not uncommon for them to carry big boxes of candles for a buck. Leave the glass door “open” and sitting on top of one latch, like during dehydrating. Otherwise, the candle won’t stay lit.
Cloudy Day Hay Box
The Sun Oven needs enough sun to cast a shadow to cook. On overcast days, use the Sun Oven as a hay box. Also called a wonder box or retained heat cooker. These cookers hold heat for a long time, allowing you to cook without added energy. When used as a hay box, cook food halfway on a campfire, stove, or other means. Then put it into the Sun Oven and latch the glass door shut. Fold the reflectors down on top of the glass, as in the picture, and set it aside to finish cooking. In a preparedness situation, use the Sun Oven on an overcast day to finish food that is half cooked. This saves fuel, time, and effort.


Leave a Reply