
BBQ ribs are a natural fit for outdoor cooking. Super-tender, fall-off-the-bone ribs smothered in a tasty sauce are a barbecue staple! I absolutely love ribs and it's a weekend highlight for the family when I smoke ribs.
Off the subject of smoking ribs, I wanted to use my GoSun Fusion solar oven to create that BBQ rib experience.
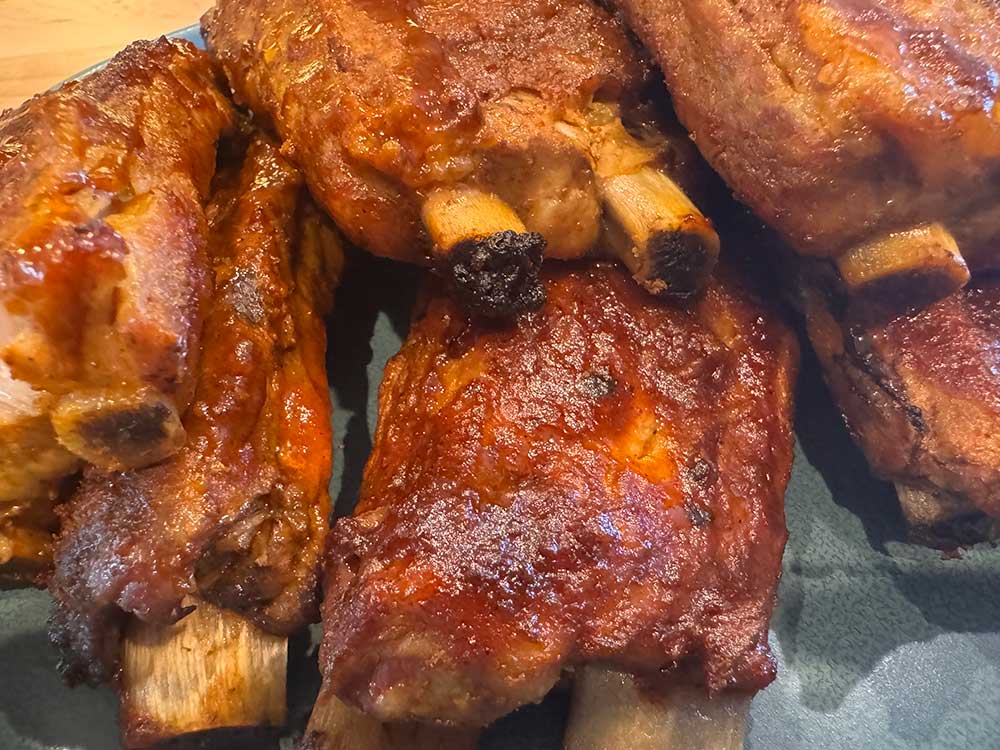
A while back I made a recipe for ribs in the All-American Sun Oven, and that turned out most excellent! So I figured I'd see how the GoSun Fusion would do with ribs.
If you're familiar with using the Fusion, you'll know that the enclosed cooking tube traps heat and moisture around the meat. That helps produce incredibly tender ribs, but it also means you need to manage the liquid that collects in the tray.
With a little preparation - and an important draining step or two - you can make ribs that are tender enough to pull cleanly away from the bone.
What to Expect From Solar-Cooked Ribs
Ribs cooked entirely inside a solar oven will not look exactly like ribs cooked over charcoal or in a smoker. There is no open flame, wood smoke, or strong dry heat surrounding the meat, so you should not expect a heavy smoke ring, dark bark, or charred exterior.
What you can expect is extremely tender meat.
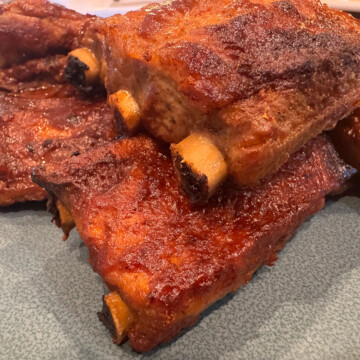
The enclosed cooking chamber holds in heat and moisture, slowly softening the meat and connective tissue. The finished ribs will be juicy, tender, and easy to pull from the bone. Adding BBQ sauce toward the end of the cooking time gives the outside more color and adds that familiar sweet and tangy barbecue flavor.
These are closer to slow-roasted ribs than traditional smoked ribs - but they are still delicious.
Why Ribs Require a Special GoSun Fusion Process
Cooking ribs in the GoSun Fusion requires a different approach than cooking them in a Sun Oven, conventional oven, or smoker.
In a Sun Oven, the ribs can cook inside a roasting pot with more room around them. In a smoker, warm, relatively dry air and smoke continually circulate around the meat. Both methods allow you to cook a larger rack in fewer pieces, and a smoker gradually dries the outside to create bark.
The Fusion has that long, enclosed cooking chamber and a narrow removable tray. The rack must be cut into smaller sections and arranged in layers to fit. A rack weighing approximately 3 to 3½ pounds should fit comfortably when divided into individual ribs or pairs.
As the ribs cook, fat and juices collect in the bottom of the tray. Because the cooking chamber holds in moisture so effectively, the liquid does not evaporate as quickly as it would in a grill or smoker.
That is why it is important to check the tray after the first 60 minutes. If too much liquid accumulates, the lower layer of ribs can begin simmering in it. Temporarily removing the ribs and draining the tray prevents them from cooking more like boiled ribs.
The BBQ sauce is also added near the end rather than at the beginning. This keeps the sugars in the sauce from cooking for several hours and gives the sauce enough time to warm, thicken, and coat the ribs without overwhelming the spice rub.
This method takes a little more handling than many GoSun recipes, but the result is exceptionally tender ribs cooked with the sun - or with the Fusion’s electric heating element when sunlight is limited.
Optional: Sear the Ribs First
One key difference between my Sun Oven instructions and these Fusion instructions is that I seared the ribs before I cooked them in the Sun Oven. Searing gives more of a traditional grilled texture, and adds a little bark.
In this cook, I decided I wanted to use ONLY the solar oven - no other appliances involved. However, if you have a grill handy I do think a quick sear makes the ribs better overall.
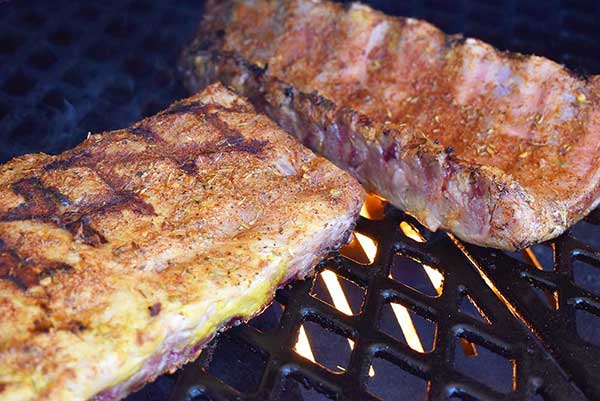
You can give the ribs a quick sear on a grill before placing them in the Fusion. This is completely optional, but it adds some browning and grilled flavor that the enclosed cooking tube cannot create on its own.
Heat the grill to a high temperature and place the seasoned ribs directly over the heat. Sear them briefly on each side, just until you begin to see some browning.
This optional step would come between Steps 5 and 6 in the instructions below.
The goal is not to cook the ribs on the grill. You are only adding color and a little extra flavor before the slow cooking begins. Leaving them on the grill for too long can dry the surface or start cooking the thinner rib sections before they go into the Fusion.
After the quick sear, transfer the ribs directly to the Fusion cooking tray and continue with the recipe.
How to Clean and Prepare a Rack of Ribs
Most racks of ribs need a little cleaning and trimming before they are seasoned.
Start by checking the bone side of the rack for a thin, shiny membrane. This membrane can become chewy during cooking and can prevent the seasoning from reaching the back of the ribs.
To remove it, slide a butter knife or the tip of a small knife underneath one corner of the membrane. Once you have loosened enough to grab, hold it with a paper towel and slowly pull it away from the rack. The paper towel gives you a much better grip than using your fingers alone.
Next, look over the rack for small bone fragments left behind from processing. Remove any loose pieces along with thin flaps of meat that might cook much faster than the rest of the rack. You can also trim away unusually thick pockets of surface fat, although you do not need to remove every bit of fat.
Finally, cut the rack into individual ribs or two-rib sections. A Sun Oven roasting pot may accommodate a rack cut into only two large sections, but the long, narrow Fusion tray requires much smaller pieces.
Cutting the ribs apart also makes them easier to arrange in two layers inside the cooking tube.
How to Make BBQ Ribs in the Fusion
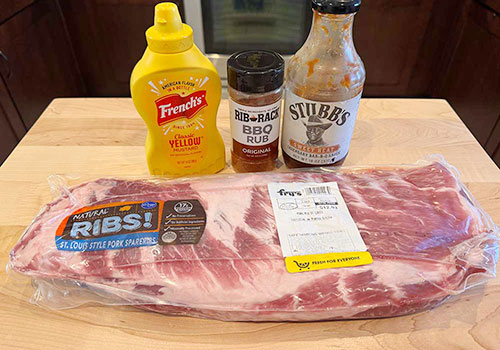
Step 1: Gather your ingredients. I find that a 3 to 3.5lb rack of ribs fits in the Fusion cooking chamber easily.
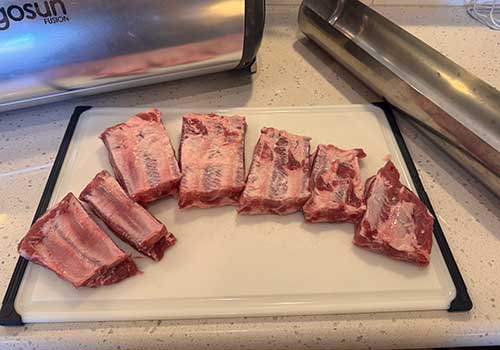
Step 2: Prepare the ribs.
Remove the thin membrane on the backside of the rack. Trim the excess meat and bone fragments from top of rack. Cut ribs into singles or pairs to fit inside the cooking tray.
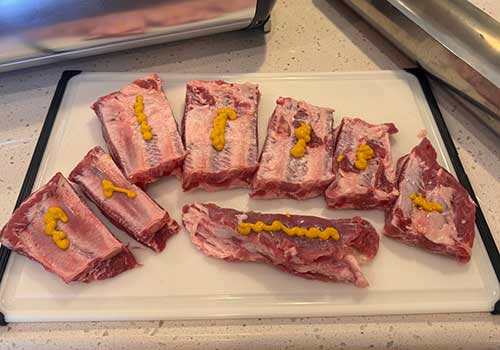
Step 3: Dab a little bit of mustard on each section of ribs. The mustard will act as a bonding agent for the spice rub.
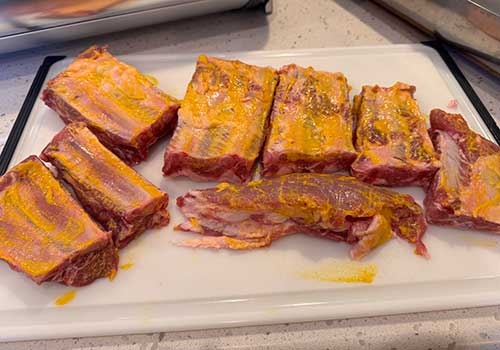
Step 4: Spread the mustard evenly on the ribs. Try to get the sides and ends too.
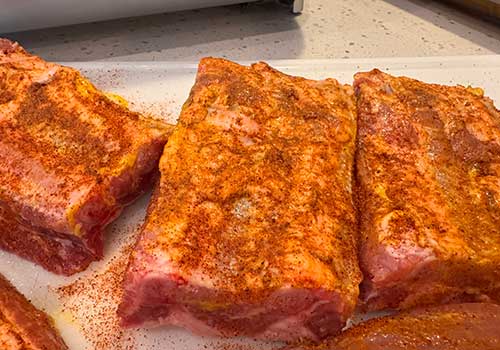
Step 5: Sprinkle the spice rub over the mustard, then use your fingers to work the seasoning evenly over the meat.
Turn the rib sections over and repeat steps 3 through 5.
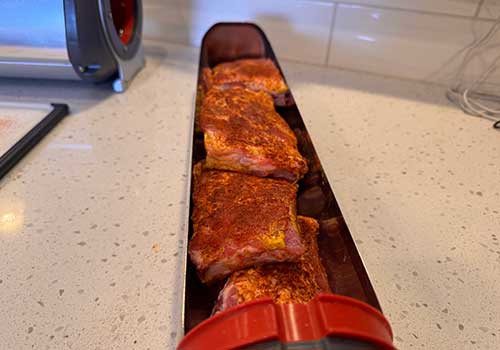
Step 6: Add the ribs in a single layer at the bottom of the cooking tray. Then add a second layer.
A 3.5lb rack of ribs should fit into the cooking tray in two layers.
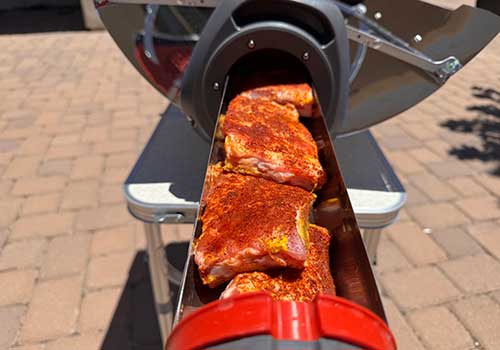
Step 7: Cook for 1 hour.
The ribs won't be done after 60 minutes, but you'll want to drain the liquid that collects in the cooking tray so that you're not "boiling" your ribs.
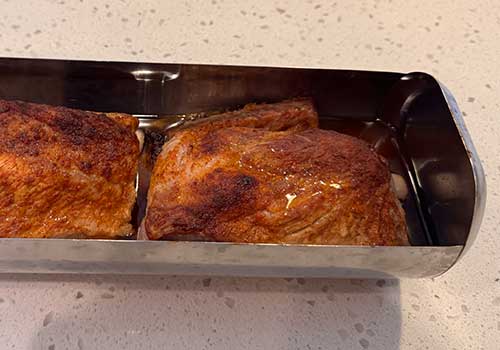
Step 8: Pull the ribs out and check for excess liquid in the cooking tray.
Remove the ribs and set them aside. Drain the accumulated liquid from the cooking tray.
Put ribs back into cooking tray and cook for another 2 hours.
Check the ribs after 30 minutes (at 90 minutes total) to make sure no more liquid has accumulated. If it has, dump again.
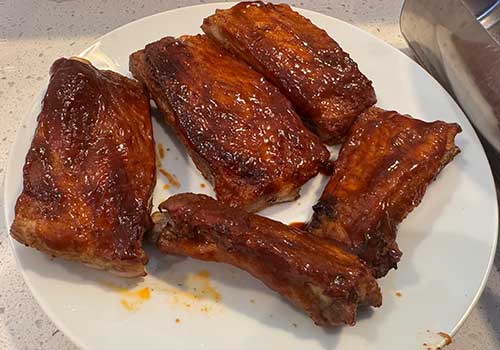
Step 9: After another 2 hours (3 hours of total cooking time), remove the ribs.
Pull the ribs from the cooking tray, and brush BBQ sauce onto all sides. Try not to let the ribs cool too much while you do this.
Place the ribs back into the cooking tray, and cook for another 30-60 minutes.
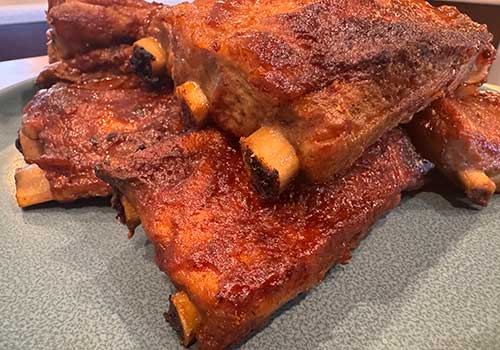
Step 10: Pull the ribs. The ribs are ready when the meat has pulled back from the ends of the bones and the ribs are very tender when pierced with a fork.
Safety Note: USDA guidance considers whole cuts of pork safe at 145°F with a three-minute rest. Ribs are commonly cooked beyond the minimum safe temperature because the additional cooking is what makes the connective tissue tender.
Using Mustard and a Spice Rub
A thin coating of yellow mustard helps the spice rub stick to the ribs. You will not usually taste the mustard in the finished dish. It mainly acts as a binder between the meat and the seasoning.
You only need enough mustard to lightly coat the surface. Spread it across the front and back of each rib section, including the ends and sides.

- Contains (1) 5.5 oz. bottle of Rib Rack All Natural Cajun Spice Rub
- A savory and spicy blend of Cajun herbs and aromatics that really brings the heat.
Once the mustard is evenly distributed, sprinkle on your favorite BBQ spice rub. You can use a homemade blend or a prepared pork rub. Look for a seasoning that includes a balance of salt, pepper, paprika, garlic, and a little sweetness.
Use your fingers to gently work the seasoning into the mustard-covered surface. Seasoning each side of the smaller rib sections takes a little extra time, but it also gives you more seasoned surface area in every serving.
You can cook the ribs immediately after seasoning, or cover and refrigerate them for several hours to give the seasoning more time to flavor the meat.
Try these Rubs and Sauces!
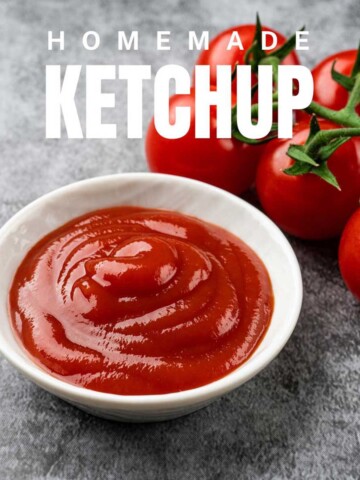
- Homemade BBQ sauce (no ketchup recipe)
- Smoky chipotle BBQ sauce (dipping sauce)
- Jamaican Jerk rub
- Jamaican Jerk mopping sauce
What to Serve With BBQ Ribs
BBQ ribs go well with many of the same sides you would serve at a backyard cookout or campground dinner.
Potato salad and coleslaw are easy choices because they can be prepared ahead of time and served cold. Baked beans, macaroni and cheese, cornbread, and roasted potatoes make the meal more filling.
For something a little lighter, serve the ribs with corn on the cob, green beans, a simple garden salad, or grilled vegetables. Pickles and sliced onions also provide a crisp, tangy contrast to the rich ribs and sweet BBQ sauce.
Good sides for BBQ ribs include:
- Potato salad
- Coleslaw
- Easy grilled Mexican street corn
- Baked beans
- Macaroni and cheese
- Cornbread
- Corn on the cob
- Roasted or grilled potatoes
- Solar braised potatoes
- Green beans
- Grilled vegetables
- Pickles and sliced onions
BBQ Ribs Recipe for the GoSun Fusion
Equipment
- 1 GoSun Fusion
- 1 Cutting board
- 1 Butcher knife
Ingredients
- 3.5 lbs Pork ribs
- 2 tablespoon Yellow mustard
- 2 tablespoon BBQ spice rub
- ½ cup BBQ sauce
Instructions
- Prepare your ribs (remove the membrane, trim off the excess meat and any random bone pieces, trim excess fat)
- Cut the rack into individual ribs or pairs (to get them to fit in the Fusion cooking tray).
- Add a dab of mustard to each rib portion. Spread mustard evenly. Apply spice rub. Rub the spice rub evenly over the rib portions with your fingers. Flip the ribs and repeat this step.
- Add the ribs to the cooking tray. You will need to make two layers. Cook for 60 minutes in the Fusion.
- After 60 minutes, remove the cooking tray from the Fusion and drain any liquid from the cooking tray.
- Add the ribs back to the Fusion and cook for another 2 hours (3 hours total cook time). Check once or twice for additional liquid accumulation. A tiny bit of liquid is okay, but if it appears the ribs are submerged, drain it.
- Remove the cooking tray from the Fusion. Pull the ribs out of the cooking tray and brush on BBQ sauce on all sides. Put the ribs back into the cooking tray and cook for another 30-60 minutes.
- Remove ribs from the oven and serve with BBQ sauce on the side!

Leave a Reply